DIY Privacy Screens: Affordable Ways to Add Style
Ever thought about how a bit of privacy could make your outdoor space more enjoyable? Creating DIY privacy screens is a great way to boost your living area’s privacy while showing off your style. I’m here to walk you through simple, budget-friendly projects like decorative wood panels and vibrant plant walls. These can turn your space into a personal retreat. Whether you’re looking for a stylish outdoor privacy screen DIY solution or want to learn how to make privacy screens that fit your taste, you’re in the right spot!
Key Takeaways: how to make privacy screens
- DIY privacy screens offer a cost-effective way to enhance outdoor seclusion.
- Creative projects can include wood panels, plant walls, and more.
- Adding style and functionality to your space is within reach.
- how to make privacy screens
- Personalizing your privacy screen can reflect your unique aesthetic.
- These solutions are perfect for various outdoor areas, including patios and gardens.
Understanding the Need for Privacy Screens
In today’s outdoor living spaces, privacy screens are vital. They create secluded areas for relaxation, dining, and entertaining. Imagine a cozy deck or patio where you can unwind without being seen. This sense of security transforms your outdoor experience.
Privacy screens are not just about looks; they serve practical purposes. They hide items that might ruin your backyard’s beauty, like air conditioning units or trash bins. These screens help you create distinct zones, making your space more functional.
Whether you have a small garden or a large lawn, an outdoor privacy screen DIY project adds a personal touch. It ensures your outdoor area becomes a retreat. You can reclaim your space and find comfort in your surroundings while adding a style that reflects your personality.
Benefits of DIY Privacy Screens
Creating your own DIY privacy screens offers numerous advantages for both your outdoor space and your creativity. One major benefit is the cost savings. By making your own screens, you can often cut down on expenses compared to buying pre-made ones. This approach lets you realize your vision without straining your budget.
Customization is another significant plus. When you decide to make privacy screens yourself, you can tailor them to fit your personal style and home’s look. You can pick colors, materials, and designs that mirror your taste, making your screens stand out as one-of-a-kind.
Accessibility is also a key benefit of DIY privacy screens. Many designs are simple, making it possible for homeowners of any skill level to take on the project. With some guidance and inspiration, anyone can improve their property while enjoying the fulfillment of creating something with their own hands.

Types of DIY Privacy Screens to Consider
When planning your outdoor space, exploring various types of DIY privacy screens can bring both style and functionality. Each type can meet different needs while boosting your garden’s aesthetic appeal. For instance, a wooden screen can offer a classic, rustic vibe, perfect for creating a cozy nook. You might also love the versatility of a lattice structure, which not only provides privacy but serves as a support for climbing plants, adding a dynamic visual element.
If you prefer a softer look, opt for fabric curtains that flow gently in the breeze. This option allows for a touch of elegance while providing an easy means to adjust visibility as needed. Natural barriers made of shrubs or vine-covered trellises provide a lush, organic feel to your space and can blend seamlessly into the garden landscape.
Each of these choices has its unique benefits. Consider your style preferences, climate, and maintenance capabilities when deciding on the best solution for your outdoor retreat. Whether you lean towards a DIY backyard privacy screen or a garden privacy screen DIY project, ensuring that your choice fits harmoniously with your surrounding elements will create the serene atmosphere you desire.
Choosing the Right Materials for Your DIY Privacy Screen
Embarking on a DIY wood privacy screen project requires careful material selection. Wood is a top choice, blending beauty with durability. Treated lumber, cedar, and pressure-treated wood are excellent due to their resistance to rot and wear. This ensures your screen remains a lasting investment.
For a more natural look, bamboo or plant combinations are worth considering. These options not only beautify your space but also bring a unique outdoor touch. Remember to consider your local climate, the screen’s function, and your design vision when making your choice.

Creating a Simple Privacy Screen DIY with Wood
Building a simple privacy screen DIY with wood can transform your outdoor space. It offers seclusion and style to your property. The first step is selecting the right materials. Choose wood that is durable and looks good.
Types of Wood to Use
When picking wood for your privacy screen, consider these options:
| Type of Wood | Benefits | Drawbacks |
|---|---|---|
| Cedar | Natural resistance to decay; attractive appearance | Higher cost compared to some other options |
| Pressure-treated Lumber | Resistant to moisture and insects; long-lasting | May require additional finishing to enhance appearance |
| Redwood | Aesthetically pleasing; naturally resistant to insects | Can be expensive; limited availability in some areas |
| Pine | Inexpensive; versatile | Less durable; may warp or rot over time |
Step-by-Step Instructions
After picking your wood, follow these steps to build your privacy screen:
- Measure the area for the privacy screen. This determines the size and number of wood panels needed.
- Cut the wood to the desired lengths using a saw. Make sure all pieces are straight and the same height.
- If using cedar or redwood, apply a stain or sealant. This enhances durability and looks.
- Build the frame by securing the vertical posts to the ground or base. Use heavy-duty screws for stability.
- Attach horizontal panels between the posts, spacing them as you prefer.
- Add decorative elements, like mixing wood types for a unique look.
- Finish the screen with a weatherproof coating for longevity.

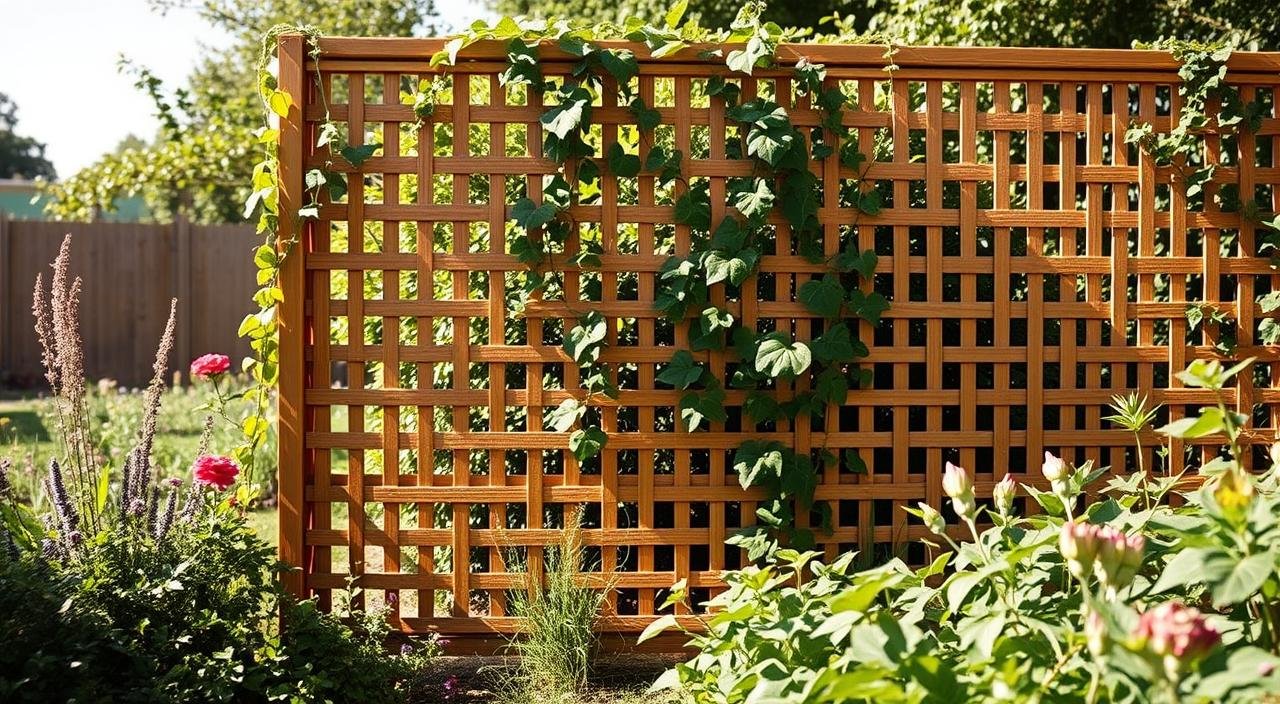
DIY Lattice Privacy Screens for Vines and Flowers
Creating your own DIY lattice privacy screen is a beautiful way to boost privacy and let your garden flourish. These screens serve as perfect supports for climbing plants, blending functionality with beauty. Let’s explore the steps to build lattice screens and how to add vines for extra charm!
Building a Lattice Structure
Start by building the rectangular frame using robust wood. Choose pressure-treated lumber for its durability. Cut the wood to your preferred size, laying the groundwork for your lattice. Secure the lattice panels with screws, ensuring a tight fit to withstand wind and weather. Your DIY lattice privacy screen will soon become a stylish addition to your outdoor area!
Planting Vines for Added Privacy
With your lattice structure in place, it’s time to plant your climbing vines. Choose varieties like clematis, jasmine, or climbing roses for their beauty and privacy-enhancing qualities. Water and guide the plants as they grow, allowing them to wrap around the lattice. As they mature, your garden will become a secluded oasis, displaying nature’s splendor while providing privacy.

Outdoor Privacy Screen DIY with Curtains
Transforming your patio or backyard into a secluded haven is easy with an outdoor privacy screen DIY using curtains. This approach is both simple and visually appealing. Start by constructing a sturdy frame with wooden posts. Then, attach curtain rods to hold the fabric. Once you drape your chosen outdoor fabric curtains, you’ll have a stylish, functional barrier.
Curtains offer unmatched flexibility. You can easily adjust them to meet your privacy needs, whether for an outdoor gathering or a moment of relaxation. Remember, using weather-resistant fabric ensures your DIY patio privacy screen can withstand the elements.

Think about the ambiance you want for your outdoor space. Curtains allow you to pick colors and patterns that reflect your personal style. The installation process is straightforward, allowing you to enjoy your new outdoor privacy screen DIY quickly. Imagine relaxing in your space, knowing you’ve created a cozy retreat with elegance.
| Material | Benefits | Considerations |
|---|---|---|
| Weather-Resistant Fabric | Durable, long-lasting | Higher upfront cost |
| Lightweight Curtains | Easy to hang and adjust | May need frequent replacement |
| Heavy-Duty Rods | Sturdy support for heavier fabrics | Installation may require tools |
Your outdoor privacy screen DIY with curtains seamlessly blends style and functionality. It’s perfect for shielding your space from prying eyes or creating a welcoming atmosphere. This project is ideal for anyone looking to enhance their outdoor space.
DIY Privacy Screens for Patios: Design Ideas and Tips
Building a DIY patio privacy screen is a great way to boost both the look and feel of your outdoor area. The possibilities are endless! You could mix wood slats with trellis elements for a modern look. This design not only adds privacy but also supports climbing plants.

For a more relaxed vibe, consider sheer curtain drapes. They create a romantic feel and offer some privacy. Picture enjoying your patio in a peaceful setting as light passes through the fabric.
Adding outdoor lights or planters to your design can make your space more inviting. Lights can brighten up your area, perfect for evening get-togethers. Planters bring a natural element. For more ideas, explore these patio design ideas.
Here are some design ideas to consider:
| Design Idea | Description |
|---|---|
| Wood Slats with Climbing Plants | Use a wooden frame with slats that allow vines to grow, providing natural privacy. |
| Sheer Curtains | Install a curtain rod and hang sheer, flowing curtains for an elegant and soft aesthetic. |
| Trellis + Lights | Add string lights to a trellis structure for privacy with added illumination at night. |
| Planter Boxes | Create privacy by building planter boxes, filled with tall plants or flowers. |
It’s important to strike a balance between style and practicality in DIY patio privacy screens. Turn your outdoor space into a private sanctuary that showcases your style and maximizes space.
Utilizing Garden Privacy Screens DIY
The charm of garden privacy screens DIY is their power to turn your outdoor area into a serene retreat. By placing panels or fences around your garden, you can set boundaries and boost its look. A trellis with vibrant climbing plants makes a lovely natural screen. It brings color and privacy to your space. On the other hand, a solid fence creates a clear separation, ensuring a quiet spot for relaxation.
These outdoor solutions not only beautify but also shield your plants from strong winds. This is key for a healthy garden. When crafting your DIY garden privacy screen, aim for designs that let air flow but keep things private. Be creative, picking materials and colors that mirror your personal taste.

Here’s a quick comparison of the benefits of different garden privacy screens:
| Type of Privacy Screen | Benefits | Ideal For |
|---|---|---|
| Trellis with Vines | Natural beauty, air circulation, and a soft barrier | Decorative elements and plant-friendly solutions |
| Solid Wood Fence | Strong privacy and noise reduction | Defined boundaries and protection from elements |
| Fabric Curtains | Flexible and stylish, easy to change | Temporary or seasonal adjustments |
In conclusion, using garden privacy screens DIY can boost both privacy and the welcoming feel of your outdoor space. Pick the best options that match your garden’s natural charm, turning it into a peaceful haven for relaxation and fun.
DIY Trash Can Privacy Screens and Outdoor Storage Solutions
A DIY trash can privacy screen is more than just practical; it’s a way to beautify your outdoor space. A simple framework with slatted or lattice designs can conceal unsightly trash or recycling bins while allowing air to circulate. This transformation turns a necessary item into a stylish addition.
Adding outdoor storage solutions that match your privacy screens can further enhance your outdoor area. Imagine a setup where trash cans blend with well-crafted sheds or decorative storage units. You can showcase your creativity by selecting materials that complement your home’s decor. A fresh coat of paint or a natural wood stain can add that personal touch, making your privacy screens blend perfectly with your design.

Integrating DIY trash can privacy screens into your outdoor storage solutions not only keeps your space tidy but also increases your home’s value. By choosing materials thoughtfully and adapting designs to your taste, you can create a functional yet appealing outdoor look. The possibilities are limitless when you let your creativity shine!
DIY Wood Privacy Screens: Adding Style and Function
Creating a DIY wood privacy screen can transform your outdoor space into a stylish retreat while providing essential privacy. These decorative wood screens serve dual purposes: they block unwanted views and enhance the aesthetics of your surroundings. Whether you prefer a rustic appeal or a modern touch, customizing your privacy screen allows you to reflect your personal style.
Consider using various wood finishes to create depth and visual appeal. Combining different textures can make your DIY wood privacy screen a stunning focal point in your garden or patio. Cut-out designs, such as geometric patterns or floral motifs, bring an artistic flair, capturing attention and admiration from your guests.
When planning your decorative wood screens, think about the overall theme of your space. Are you looking for something sleek and contemporary or warm and inviting? The versatility of wood means there’s an option that fits every design aesthetic. Plus, building a DIY wood privacy screen can be a fulfilling project that brings a personal touch to your home.

Creative and Affordable Solutions for Backyard Privacy
Creating a welcoming backyard retreat doesn’t have to break the bank. By using creative backyard privacy solutions, you can enhance your outdoor space without overspending. Consider building a mosaic wall with repurposed materials. This not only provides privacy but also brings a unique artistic flair to your garden. Another option is using potted plants to create a natural barrier.
These projects are both simple and rewarding, allowing you to enjoy your backyard in peace. Affordable DIY privacy screens can significantly improve your outdoor experience without requiring a lot of resources. Whether you’re an experienced DIYer or just starting, these ideas encourage you to experiment and be creative.

| Solution | Materials Needed | Estimated Cost |
|---|---|---|
| Mosaic Wall | Repurposed tiles, adhesive, wood frame | Approximately $50 |
| Potted Plant Barrier | Potted plants, soil, decorative pots | Approximately $30 |
| Wood Pallet Screen | Old pallets, paint, screws | Approximately $40 |
| Fabric Curtain Screen | Outdoor fabric, curtain rod | Approximately $60 |
With a bit of creativity, you can turn your backyard into a special space. Embrace these ideas and create a stylish, peaceful area to enjoy.
DIY Privacy Screens: Important Installation Tips
Ensuring your privacy screen is installed correctly is key to its longevity and effectiveness. Begin by gathering necessary tools such as a level, screws, and brackets. These tools are essential for securing your freestanding screens. Proper preparation is the first step to a successful installation.
When tackling the installation of privacy screens, focus on the anchoring process. A sturdy anchor is vital for screens that are large, as it offers stability against wind and wear. Neglecting this step can result in frequent adjustments and a less-than-satisfactory outcome.
Here are some DIY installation tips to help you along the way:
- Always check for underground utilities before digging any holes.
- Make sure the ground is level to prevent uneven installation.
- Adhere to the manufacturer’s guidelines for placement and spacing.
By following these tips with care, you’ll achieve the best results for your DIY project!

Conclusion: DIY backyard privacy screen
Our journey through DIY privacy screens reveals their value in boosting your outdoor space. These solutions cater to your style, whether you opt for a wooden fence, a lattice display, or vibrant vines. The possibilities are vast and exciting!
By taking on DIY privacy screens, you gain privacy and showcase your creativity. Each project is a journey, turning your outdoor areas into serene retreats. So, don’t hesitate. Begin your DIY project now and revel in a private, stylish outdoor haven!
FAQ
What are some DIY privacy screen ideas for my backyard?
How can I make a simple wood privacy screen?
What materials should I use for a DIY privacy screen?
Can outdoor curtains be used for privacy screens?
How can I ensure my privacy screen is durable?
What are creative ways to hide trash cans outdoors?
Are DIY privacy screens expensive?
How do I maintain my DIY wood privacy screen?
How long does it typically take to build a DIY privacy screen?
Can I add lights to my privacy screen?

AUTHOR: MARIA JOSE VENTRAMELI
Specialist in Home Design, Architecture, and Trends
With years of experience writing for top home and lifestyle blogs, she now contributes to 17Vibes, offering practical, research-backed insights on renovations, smart technology, sustainable building, and modern living trends. Join our Facebook community here